How to Travel to an Audition: What to bring and how to get it there

For percussionists, traveling to auditions can be more challenging than playing the audition. We have to get ourselves, as well as a shopping cart full of gear to the audition, that could be halfway around the world. We are not the only ones that have this issue. I have helped tuba players and bass players get to the airport with their over-sized cargo in my truck. We may have it bad but at least our equipment can break down into small pieces. They have to beg and bribe their way onto airplanes!

To start with let’s ask ourselves what we need to take to the audition. I always start with this because first and foremost I want to sound my best. If that means overcoming some logistical issues, that’s fine, but I can’t sound great if I don’t have the right stuff. I go instrument to instrument and make my decisions based on the rep I must prepare.

What to bring

Snare Drum

Let’s start with snare drum as it is one of the largest instruments we might bring. I own about 10 snare drums and use 5 with the orchestra on a regular basis. So obviously this is not possible at an audition. But is also isn’t necessary. In the audition you aren’t competing with 100 other musicians. So your sound needs are different. I typically bring 2 drums to an audition. Those 2 drums may vary based on the repertoire. I either bring a piccolo drum like my Grover KeeGee drum and a 4″ Symphonic drum or I bring that same 4″ Symphonic drum and a 5″ Symphonic drum. I always bring that 4″ because it is what I use for most of the repertoire at an audition. It covers a wide dynamic range and is great for etudes. If the list has a lot of extremely soft passages, I will also bring the piccolo drum. If the list is really heavy on the loud repertoire, I will bring the 5″. Now for a lot of you, your first drum was a 6.5″. Mine was! Don’t fret, this drum is extremely useful! But it might be a little bit much in the volume department for an audition. When you are by yourself, you can make a 5″ drum sound plenty loud. If I am in the finals and the screen is down I might bring the 6.5″ as a third drum to show a wider palette, but probably not before then. I also bring my own stands for my snare drums. I use very light weight stands so they travel easy and I don’t have to rely on someone else providing them.

Cymbals

The next large instrument we must cover are cymbals. This is a tough one. They are heavy and to play all of the repertoire it’s not unreasonable to think you might have to bring 4 pairs with you. My recommendation on cymbals is to only bring cymbals if you are uncomfortable with what you think they are providing. This is for various reasons. If the group you are auditioning for has a long history then they are used to the sound of the cymbals they have used for 20 + years. Even if your cymbals are awesome and you play awesome, they will still sound different from what the committee is used to and might be judged as not as good. In that one instant you have to impress them, you will be doing yourself a favor if you use the instruments they are used to hearing. If you are auditioning for a school, chances are their cymbals are great and once again they are used to hearing them. Do yourself a favor and use the cymbals provided. The only scenario I would bring cymbals to now is if cymbals aren’t provided (duh…) or I am really uncomfortable with what they are providing. If you do bring cymbals I recommend a bag with wheels so you aren’t carrying so much weight. Zildjian make a great one.

Tambourines

I absolutely would bring your own tambourines. I think tambourines are the most personalized instruments especially when it comes to thumb rolls. I have tried to pick up someone else’s tambourines and I can’t play a thumb roll to save my life, yet they have no problem! You know how you like your instrument so just bring all of them you need. They don’t take up that much room anyway.

Triangles

Triangles are similar to cymbals in that a group can be used to a certain sound. If an orchestra is providing triangles, I might use their recommendation because again, it is what they are used to hearing. They know their hall much better than you do. I would bring my own clip and beaters so the implements I am holding at least feel the same. If the group is not providing triangles or you really love what you are using, then of course, bring your own.

Sticks and Mallets

For sticks and mallets it goes without saying, but bring them all! These give us our sound and are vital. They don’t take up a lot of room and you really can’t play the audition without them!

Other accessories

There are a lot of little accessories that you need to bring depending on the repertoire and how much you really need them. For bass drum, make sure you have whatever mutes you need. If you need towels for tambourine bring those. If you like putting a towel over the lower end of a marimba (below the A), bring that. If you are incredibly tall and find it difficult to play marimba solos on a low instrument, bring some blocks. I would try not to use them for time reasons but if you are 6’6”, then you probably need some blocks. You know yourself and you know your playing so make a list of these little toys and make sure you bring them.

airport-luggage

How to get all this stuff there!

This can become an annoying game of Tetris when it comes time to pack for the audition so do a trial run a week before the audition. Make sure you have a plan and it works. Here are a few rules I would follow that I have learned from trial and error.

  1. Every bag is on wheels or can be put on wheels

You can work out before and after the audition, but the days surrounding the audition is not the time to be sore. All suitcases and gear bags need to be on wheels. Don’t plan to carry anything heavier than a backpack.

  1. Make sure sticks and mallets and anything you literally can no live without is in the carry-on.

Sure you want your favorite snare drum there, but if you don’t have any xylophone, glock, or vibes sticks, it’s going to be pretty hard to play the audition. Prioritize and make sure the stuff you literally can’t live without goes in carry-on.

  1. This is not the time to penny pinch.

If all the stuff you need means you need 4 bags, then bring 4 bags! Yes it will cost you extra to check bags. Yes you will have to pay for a luggage cart at baggage claim. Yes it means you will need a cab instead of the subway. However, we are talking about maybe $200 in extra expenses. Seriously? Don’t waste the thousands of hours in the practice room because you are trying to save at the most $200.

  1. Label all bags multiple times.

Do I need to explain this one?

  1. Use hard shell luggage.

Let’s be honest, clothes are about 5% of what we are bringing to the audition. The rest if gear! Make sure the outside is hard so nothing can poke and damage an instrument. Most hard case suitcases can fit 1 snare drum in a soft bag as well as some toys, a stand, and some clothes. I have even seen people rip out the lining of a hard suitcase and glue their own foam lining in to make sure it protects the instruments.

1-1272485349-lost-luggage-at-santiago-airport

How to move around

Only in the percussion world do we ask ourselves questions like this. How do I even get from one place to the next with all this stuff? Because I have never taken exactly the same stuff to multiple auditions I don’t have a tried and true method. I have to replan and repack for every audition. There are some similarities though. I typically have a hard-shell suitcase with a drum in it, a rolling duffle bag with hardware and odds and ends, a backpack or stick bag, with most of my sticks, and a hardcase snare drum. The snare drum can strap on to the duffle bag and boom, I’ve got a suitcase rolling in each hand and a backpack. I look like I’m packed for a month, when I’m only gone for 2 days, but I can manage to navigate the airport.

Once I arrive at the audition I repack. I get everything ready to walk onstage or in the teacher’s studio. I ALWAYS ask the proctor to carry my drums and anything else I can get them to take. Again, I want to be as relaxed as possible. Carrying 40 pounds of equipment onstage will not help that. I have a cart that I roll onto the stage that has everything I need other than snare drums and cymbals. Before there were “P-bags” I would take a Stevens bag and fold it backwards so there were mallets on each side and hang it from the top of the cart. Easy access to all my sticks and mallets. All of my tambourines, triangles and toys were in a small bag on the bottom. I would normally put a picture here of what I use but my cart broke at this past year’s PASIC. Guess it is time to order a new one.

http://www.amazon.com/Magna-Cart-MCX-PINK-150-Pound-Handtruck/dp/B00E3MEEYE/ref=sr_1_5?ie=UTF8&qid=1434376226&sr=8-5&keywords=magna+cart


I want to thank Joe Bricker for the email that inspired this post. I have been waaaaay behind of where I like to normally be on these posts and his email Saturday night inspired today’s post. Hope this helps Joe!

WJ

How to Make the Correct Mistake

mistakes_happen

Contrary to popular belief, professionals make mistakes. Lots of them. It is rare that I play a concert and don’t have notes I wish I could do over. Most of my colleagues would echo these same sentiments. I know that they are going to happen so my goal is to make sure my mind and focus is in the right place so at least I am making the best mistake. Today we are going to look at some scenarios of when and why mistakes happen and try to eliminate them or at least make sure our priorities are in line so we make the best mistake.


In my mind there are two mistakes that can happen.

  1. Mistakes that you have control over: you theoretically could have prevented them.
  2. Mistakes that you have no control over: the situation was totally out of your control and there was nothing you could have done.


We can work on number 1 but the second scenario is tough to swallow. But it does happen. The ensemble moves unexpectedly. The conductor did something different and you weren’t able to adjust. There was something wrong with the instrument that you didn’t notice before the performance. The harpist moved and now you can’t see the conductor. Should I keep going? I think you get the point. We try to eliminate all variables that could prevent a good performance but sometimes the planets don’t line up and mistakes happen. I’m not going to spend a lot of time obsessing over those types of mistakes here because I have a feeling we all obsess over them an unhealthy amount already!


We can’t prevent all mistakes but how can we minimize or at least make the correct mistake? So what exactly is a correct mistake? Good question! I describe a correct mistake as a mistake that was made with the correct priorities in mind. The easiest example is a situation we have all been in. Sadly…. So, you get lost and don’t know when your next cymbal crash is. You guess, and play a loud crash, but in the wrong place. (Cue cartoon noise Wah, Wah…) Obviously we never want to be lost, but it happens. The “correct” mistake in this scenario is to either rely on cues you wrote in your part as you were preparing or simply don’t play if you are truly lost. Not playing the crash is a mistake for sure. But wouldn’t you rather miss the crash than play it two bars to soon? More examples of “correct” mistakes later.


A lot of mistakes happen due to lack of preparation. As I talked about in my post on learning how to focus, preparation is our biggest asset. The first step is learning the notes. This is obvious but should be stated as you will have little to no success not knowing your part. The next step in ensemble playing that is often over looked is knowing how your part fits into the ensemble. You can play all the right notes but if they don’t fit with everyone else, it doesn’t matter. The more you know your part and how it fits with others the better you will be at preventing mistakes.


Some mistakes can happen because of non-musical situations. The pedal on the chimes could be stuck and you not notice until you have to play. A quick check before the concert and you are good to go. A situation that happened to me recently was right at the beginning of an opera my mallets were hovering over the first notes but the conductor took more time than usual waiting for the stage before starting. I got a little nervous about making sure I was above the right notes so I looked down to double check. When I looked back up, the orchestra had started. Whoops! I jumped back on but not exactly the start you want! So the next performance I rested my mallets right on top of the first notes so I could literally watch the conductor forever and be ready to go. Lesson learned. The more experience I gain the more I try to anticipate non-musical situations like this to be prepared for. It’s a different kind of preparation but one you can develop an eye for.


Unfortunately a lot of mistakes happen because of mental fatigue or a lack of focus. You can be as ready as you can possibly be but you might be tired or just zoned out. If it is a lack of focus that is creating the mistakes then you need to work on your focusing. This is a skill that can be practiced and improved. If you are simply tired or exhausted, then you need to be aware of what you limit is and make sure you have adequate rest before a performance.


Now to the most important part of avoiding mistakes. Making sure your priorities are correct and in line. Remember a correct mistake is a mistake that was made with the correct priorities in mind. I’ll give you an example before I list some of what I think are the right priorities to have.


In the same opera I missed the opening of (doh!) I had this passage to play on glock.

Blog-mistake1

The passage is obviously syncopated and is with the woodwinds. In one of the first rehearsals (luckily) I was really focused on the conductor and the winds so we would be lined up and I played the following.

Blog-mistake2

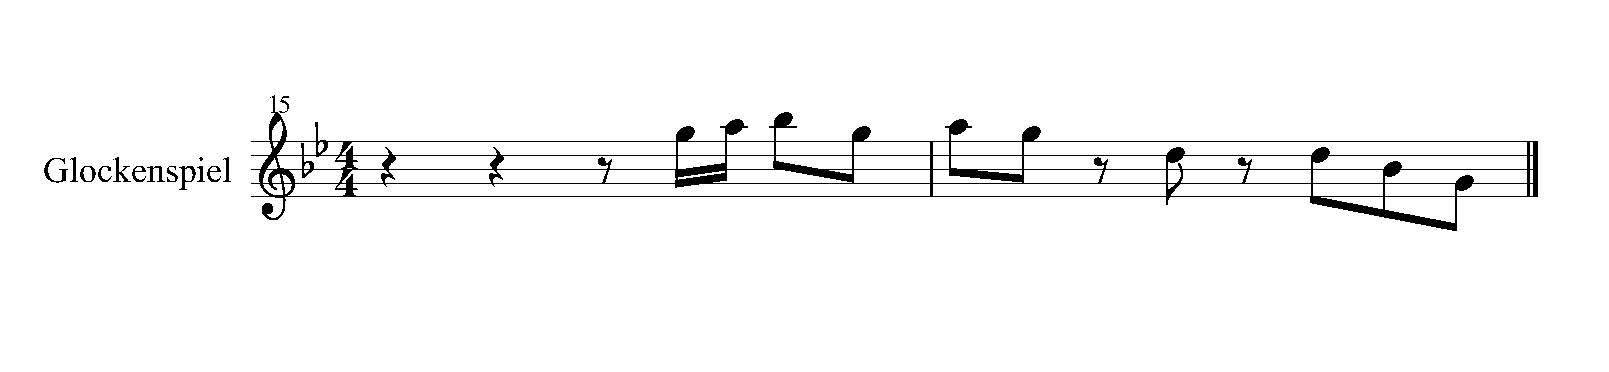
Sure I missed some notes at the end but the notes I played showed I had the correct priorities in mind. I was still playing within G minor. I played the same syncopated rhythms the winds had. I played the same shape or line they had. While of course I realized immediately I had a made a mistake, it was one I could live with. In fact I would rather play what I did, together with the ensemble, than be glued to my part, play the right notes but not with the ensemble.


So what are some other priorities we should keep in mind to make sure we are making the correct mistake?


The time of the orchestra and my placement

Who I am playing with in the orchestra

The key signature

The “scale” my passage is in

The cues right before I play

The relative dynamic of the orchestra

Where the big moments are

What big beats need to line up

My role in the orchestra


Of course the goal is to play perfectly all the time. If we are honest with ourselves we know this is not possible. After I make a mistake, of course I’m upset and wish I could go back and fix it, but guess what? Not possible! That’s live music baby!! With this approach though I am able to minimize my mistakes or at least make correct ones. The better your prepare, stay focused, and have your priorities in line, the better your performances will become.
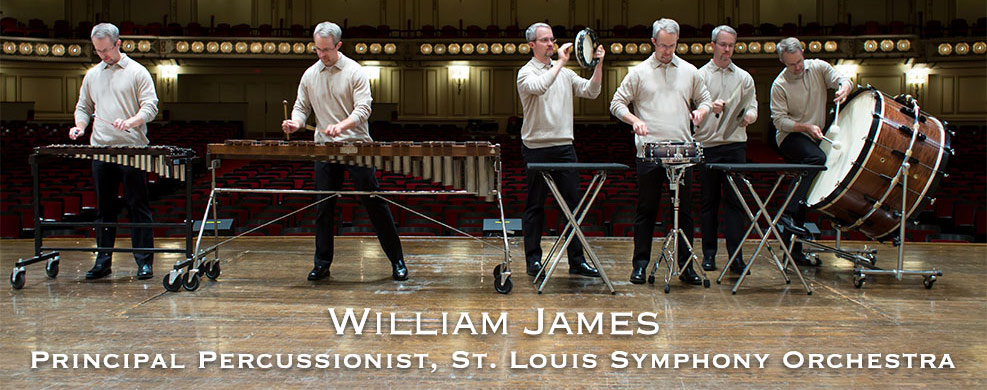
 

WJ

How to Choose a Mallet

We all have our favorite mallets for each instrument, but how do we choose the best mallet for the part? No matter which instrument, whether it’s marimba, vibes, xylo, or glock, we can use the same philosophy for all of them. Today I’m going to outline the process I go through mentally when I choose a mallet. The hope is that this process will make your playing having a little more color. Just as a painter uses multiple colors in a painting we can use multiple sound colors. The mallets we have are our pallet. Of course having all the mallets in the world doesn’t mean much if you don’t know the right place to use them. Here is how to find the right mallet for every situation. 


I always start my mallet choice decision with articulation. As percussionists the start of the note is what we have the most control over. For most of the instruments we play we don’t have much control over the sound after the note has started. With that logic, the articulation is pretty darn important. I have started thinking more and more about my mallet playing like a wind player. “How would a wind player attack this note?” I love the word attack. It’s a great adjective to think about articulation. It doesn’t necessarily have to mean aggressive but it definitely doesn’t imply anything passive. A wind player might use words like these to describe their attack and sound:

Light

Dark

Heavy

Warm

Round

Sharp

Bright

Thin

This more sophisticated approach is getting us a little further away from the typical mallet description of soft and hard. That is a very two dimensional way of looking at mallets choices.

Another “dimension” we can use to think about articulation is weight. I don’t mean how much a stick weighs or how hard we are playing the note. I mean how much weight is behind the mallet head. Weight has a lot to do with how much presence a note has. You can start with two identical mallets but if there is a brass insert inside one of them it will have a little more presence. Adding brass inserts has become really popular to keep the articulation desired but give the mallet more weight and presence. The size of the ball has a lot to do with this as well. A ¾ inch and 1 ¼ inch ball made of the same material will have very similar articulations but very different overall sounds because of the difference in size and weight. Along with more weight, the bigger mallet is making more contact with the bar because of the increased surface area. I find that when I prepare the same work for both an ensemble situation as well as an audition (solo) situation the weight is the biggest variable I change. When playing alone, I don’t need as much presence as when I play in the orchestra. I will probably want very similar articulations but a heavier weight when having to cut through other players.

Another variable that controls the sound of the mallet is the shaft. This is fairly minimal but it does have an effect. I have no scientific research that proves what I believe but my experience tells me that the shaft effects both how you play the instrument and how the head responds off the instrument, and thus the sound. A stiff shaft, like a birch shaft, will usually produce a heavier sound. The head of the mallet will stay on the bar longer and the stroke is usually more emphatic. Because of this most xylophone and glock sticks do not use birch. Birch is great for four mallet marimba because that stiffness allows you to control the mallets more precisely. Rattan is the middle ground. There are thicker, stiffer rattan shafts as well as very thin, flexible rattan. This will have an impact on how you strike the instrument as well as how long the head of the mallet stays on the instrument. In the last 15 years or so there have been specialty glock mallets that are on a very thin fiberglass shaft. The reason (I believe) these sound so great is because of the way they respond off the instrument. The extremely flexible fiberglass allows the mallet to pop right of the bar and thus allowing the bar to vibrate with less interruptions.

The last variable I use are my dynamics and thus stick height. Essentially I am picking the best mallet for the entire passage and then using the stick height necessary to produce the dynamic warranted. Because a passage could require all sorts of sounds and dynamics I pick the best mallet possible because dynamics are the only thing I can adjust within the passage. Marimba players are used to this issue of picking the best four mallets to play a 15 minute solo. Luckily in the symphonic repertoire we can change mallets with greater frequency. Another reason dynamics are one of the last variables I consider when choosing a mallet is because I don’t want the dynamic to influence the articulation too much. It is very easy to fall back on p = soft articulation and f = hard articulation. You will be surprised how many times you want a crisp, sharp articulation in the soft dynamic. We can manipulate volume rather easily with the intensity of the stroke, but we can’t change the articulation.

A lot of you may be wondering why I don’t have “mallet sound” at the top of the list. Well although I haven’t listed sound specifically, everything we have talked about thus far effects the end result or sound. The only aspect of sound we haven’t discussed is sustain and the mallet doesn’t have a lot to do with sustain!

A lot of this logic can be used for other instruments such as bass drum and timpani, however for those instruments the stroke can influence the sound much more than on the mallet instruments.

So to recap:

1. Articulation – How do you want the start of the note to sound?

2. Weight – How present do you want the note to be?

3. Shaft – Which shaft type will compliment your musical choices?

4. Dynamics – How can you use dynamics to get the most out of the mallet you have chosen?


 Having a very wide palette of options can make mallet playing a lot of fun. Especially when you are playing a seemingly easy part of single notes. Finding the right color and sound for every situation will really help your playing stand out from the rest.

Learning How to be a Performer: Focusing in the Moment

focus-concentration

A performance is really a continuous series of moments in which one’s sole focus is on executing their contribution to that performance. That’s a heavy statement right there… Learning how to focus in those moments is a life’s work. I believe everyone has this skill, even those who claim to have severe performance anxiety. The difference between all of us is where our performing skills shine. Some of us have the ability to focus when performing music, some have the ability to focus while cooking. I couldn’t possibly stay calm and focused during surgery, but to a surgeon it’s just another day at the office. However, that surgeon might be petrified to play a single triangle note onstage. We all have our areas we are more apt to succeed in. Today we will discuss how to focus onstage.

Earlier I said “one’s sole focus is on executing their contribution to that performance.” This is the crux of performing. If I am playing bass drum on Stars and Stripes, fitting those quarter notes in the right spot is 100% where my mind is. I am listening to the basses and the low brass to make sure my placement is perfect. If they move ahead a smidge, I want to be right there with them. Earlier in the concert I could have been playing the tambourine part to Carnival Overture and in that moment it would be focusing on leading the ensemble. The reason Bolero is so difficult is not because of its technical difficulties. The challenge lies in the ability to focus and keep the group together for the entire 15 minutes of the piece. Having big ears and adjusting and moving the group into some semblance of the same tempo throughout the piece takes a lot of mental energy. This is the perfect example of a piece that demands focus and being in the moment. Learning how to sharpen our focus will be the goal of today’s post.

The first time I really worked on this was at Northwestern’s summer music camp the summer of my junior year in high school. I must admit, it was not a fully conscious effort. The players I was playing with were the best I had ever been around and I certainly didn’t want to be the weak link in the group. It was a wakeup call. I thought to myself, “Hey, you better dial it in here to fit in with these other kids.” That motivation caused me to focus more during rehearsals and especially in concerts. It wasn’t so much that I was afraid to mess up as I wanted to play on the same level as these other fantastic young musicians. I realized that I was learning how to be in the moment and concentrate solely on the task at hand; playing music. That “zen” state I was in was one that I have been working on perfecting ever since.

So how can one get better at this? Learning to focus in the moment is incredibly difficult. And there is nothing less helpful when trying to focus than someone saying…… FOCUS!!! Even those that are great at it still have wandering minds. (I find myself distracted by the backyard that needs mowing as I type this…) I find a lot of the tactics to deal with a wandering mind to be a little too “hocus pocus” for me. I know they work for some people, but I never found them helpful. The drill I have found to be the most helpful is to ask myself the question “What is my goal?”. A very simply question, but one that gets right to the point. What I find is that my mind immediately goes to what I am trying to accomplish. If I am playing the Third Movement of Scheherazade and I ask myself “What is my goal?” my brain immediately goes to:

project a light, lilting style

very steady and supportive

sensitive, round dynamics

energy in the rhythms

Ask yourself the same question about Porgy and Bess. Take 30 seconds to make a list of your goals.

What you will notice is you came up with some very concrete musical goals to accomplish. What you will also notice after the fact, is what you weren’t thinking about! You weren’t thinking about your shaky hands. You weren’t thinking about how you always miss the A natural in that one spot. You weren’t thinking about how out of control the grass is in the backyard either. This is a great way to focus in a performance or audition and essentially distract yourself by asking the right question. That question might be different for you but asking yourself some version of “What is my goal?” shifts your brain to what is important. This is a topic discussed at length in the book I mentioned last week Fearless Golf, with obviously much more of a golf focus.

So why a question and not a statement? A question is a better way to refocus because it causes you to focus on what YOU think is the answer. A statement is merely a list of facts you believe in, but a question engages the brain in a much deeper way. It almost starts a conversation in your brain. For example which thought do you think is going to be more helpful?

“What is the style of this work?”

“Don’t rush.”

Asking yourself about the style is significantly more helpful! It conjures up multiple adjectives and thoughts that are going to help your performance. Telling yourself not to rush may prevent you from rushing but will not be helpful in any musical way and may even cause you to drag!

Obviously this is incredibly easier said than done, but it is an exercise that I really believe works. Just like music, being able to focus is a lifelong pursuit. Even when life is great it is easy to be distracted, let alone when things aren’t great. For anyone who has stood onstage in a performance and felt really involved in the performance and been tuned in knows what a rush that is. That is exactly the goal! Good luck with your own pursuit of being a performer; now I’ve got to go mow the lawn!

WJ

Examining Fear and Anxiety at Auditions

Fear is a powerful emotion. It can be crippling. Our body is literally programmed to protect us from what we fear. “Fight or flight” anyone? Auditions, sadly, can elicit fear and anxiety. We have all felt that feeling of wishing we could get off the stage and hide as fast as possible. There are many things one can fear. Things that are very serious like death or serious injury, to the not so serious like spiders or public speaking. While the conscious brain recognizes that taking an audition is not as life threatening as falling from a 4 story window, don’t even bother trying to explain that to the subconscious brain! I have heard from many of you that the fear you feel at auditions can be debilitating. This is also common for performances. Dealing with this emotion is vital to any form of success.

Today’s post will examine what exactly we are afraid of and why. Next week I will look at how we deal with that fear and how we can manage it. I broke this discussion into two halves for a couple reasons. I want to really dive into what makes us anxious and try to figure out why. Really understanding the why will help us know where to look to try and deal with this fear. Trying to examine why we have anxiety as well as solving those issues would also make this post quite long and I want to have plenty of dedicated space for a discussion on dealing with fear. Lastly, I want to give you a chance to weigh in, in case I’ve missed something that sends you over the edge. Leave a comment below or send me an email at william.j.james@gmail.com.

photo-StageDoor-1

So…. What exactly are we afraid of?

Not all fear is the same. Unfortunately there are many things that can cause fear and performance anxiety. Here is what I think most people are afraid of:

  • being unprepared
  • failure
  • success
  • personalizing fear
  • not meeting expectations

Let’s look at them one at a time.

Are you prepared?

I believe this is the main catalyst for fear at auditions. Who has thought “Am I really ready for this?” right before an audition? I know I have! And I’m guessing most of you have as well. I think this is for two reasons, that aren’t necessarily mutually exclusive.

  1. You know deep down, you aren’t prepared and you are dreading when someone will figure it out.
  2. You genuinely aren’t sure if you are prepared or if you prepared correctly.

#1 highlights the physical preparation. #2 highlights the mental preparation. Any performance needs both physical and mental preparation. If you have the confidence and mental toughness of a professional but don’t have the hands, guess what? The result is going to be poor. If you have hands better than anyone, but have no confidence, you are going to crumble as well. This is why I think this is the biggest cause of fear. You have to have both. In many ways our mental preparation is more important than the physical. Our focus and mental state is so fragile, we have to be in a good place in order to play well. We will look more into how to do that next time.

Fear of Failure

Fear of failure is something we can all relate to. No one likes to fail. This was ingrained in our memory from elementary school when the teacher would ask you a question. If you got it right you were praised. If you got it wrong you experienced negative consequences like lower grades, disapproval from teachers, friends and parents, not to mention embarrassment. This doesn’t need a ton of explanation as we all hate to fail.

Success

I have asked this question in multiple masterclasses and it says a lot about the mental state of those taking the audition. What is your reaction when the proctor walks in the room and says you have advanced to the finals? Is it “oh boy..” and your nerves get jacked up? Or is it “bring it on, let’s go!”? It is easy to understand each emotion. It is also pretty easy to tell which one is better… Sure you might be anxious about failing but it very well could be that you are afraid of succeeding! I have met many young percussionists who are clearly not ready mentally to succeed yet. They will get there but this also harkens back to being prepared. If you are not sure if you are prepared, then you may worry about sneaking through the audition and then not succeeding at the job. It is also entirely possible that in one’s mind they would love the chance to win an audition. However, once the spotlight gets hot and the chance to win is there, they panic and no longer feel as comfortable as they thought they would. This situation isn’t always easy to recognize, and many don’t want to recognize it, but being afraid of success is common.

Personalizing Fear

It is very easy to take failure personally. We are afraid that being cut at an audition is a reflection of who we are personally and everything we have ever done. While logically we may know this is not true, in the moment it is pretty hard to convince yourself otherwise. I don’t need to tell you that there are a lot of egos at an audition and those egos can really get in the way! Everyone has an ego and fear of hurting that ego can have a real negative effect at an audition.

Not meeting expectations

Not meeting your own or someone’s expectations for you can cause severe anxiety. Big expectations can cause serious pressure! You may feel like you have to win an audition. You may be a sophomore and feel like you have to get out of the lower level ensemble at your university. That sort of expectation can be frightening and cause severe anxiety. Managing these expectations is very important. Expectations are good in theory because that means you expect good things, but keeping them appropriate is important. More on that next week!

So these are the main scenarios I have experienced or heard of causing fear and anxiety. Not fun!! I still experience these symptoms by the way! When I play solos I still get quite anxious because I am so used to playing with an ensemble. When it is just me it can feel quite lonely and intimidating. Challenging myself in that environment and forcing myself to face those fears helps me grow as a musician. Learning to cope and deal with these fears is very important, although not easy. I’m looking forward to hearing from you and commiserating over shared stories, but I am even more looking forward to next week and discussing how we deal with fear and conquer it!!

WJ

How to make playing, insert composer here ___”Beethoven”___, easy in 5 simple steps

We all have composers or styles of music we struggle with. Beethoven was mine. I’m going to use my struggle with Beethoven to show you how you can conquer that area of music you never thought you could play.

I was never going to play Beethoven correctly. I played for all kinds of people and no one (and I really mean no one) liked the way I played Beethoven. I would listen to tons of recordings. The same ones I’m sure you have. Cleveland, New York, Boston, Philadelphia, Berlin, etc… I would practice and record myself. I did everything, everyone tells you to do. But to no avail. Needless to say I was pretty discouraged.

I would listen to teachers, professionals, and other students talk about Beethoven’s works in a way that would make you believe if only we could harness their power we could cure the world of cancer and HIV in an afternoon. They talked as if you need two Phd’s in order to be allowed to perform his music. Beethoven, to me, was a unicorn. Perhaps climbing Mt Everest. That was how impossible the task felt. Despite my inadequacy in performing Beethoven, I really did love the music.

Beethoven-post

Step 1: Study the music

The notes on the page are our first clue into how we should approach any piece of music. With Beethoven, my confidence grew as my knowledge of music theory grew. I was never drawn to music theory in a scholarly way, I found it beneficial in a very practical, functional way. This was very important in my quest to play Beethoven. After some very basic studying I found I could understand the forms. I understood how he would move from this key to that key. I understood all the basic components of the music. It was genius. His writing was the perfect combination of basic music theory and unbelievable expression. I understood all of this, I just couldn’t put it together.

Step 2: Understand the time period and style

Understanding the historical context and performance practice is very important for any composer but especially a warhorse composer like Beethoven. I knew this at the time but needed to figure out how to apply it. All the recordings I talked about helped me understand appropriate tempos and how to stylize rhythms. They also helped with quality of sound and articulation. Even within all of those great recordings there is a range of appropriate choices. Figuring out how to take this basic knowledge of music history and theory and apply it was a struggle. It was around this time that I learned two very important lessons.

Step 3: Don’t overly complicate the music

The first lesson was: don’t overly complicate what you are trying to do musically. The music may BE complicated, but it doesn’t help to complicate IT. That statement can really apply to all music. Let’s face it, Beethoven carries a lot of baggage. He wrote some of the most popular music in the history of western society. That comes with some serious performance practice and an enormous amount of opinions. The problem I was running into was I was trying to play it just like they do in Cleveland at the same time as how they play it in Berlin. Oh, and I was also trying to play it like Vic Firth in Boston. But what I found most difficult was trying to do all of that at the same time as trying to please the teacher standing in front of me. All. of. this. is. impossible. Once I realized this. My life got a lot better.

Step 4: Take all the knowledge you have available and then play it the way YOU think it should be played

The second lesson I learned was from Will Hudgins. I studied with Will at NEC in Boston. We had and still have a great relationship and I can’t say enough about him as a teacher. He could sense my insecurity in playing Beethoven but also other composers as well. Finally, he just said “Play it how you hear it. How you hear it in your head.” What a concept??? I did have my own opinions on how I thought it should sound but I had blocked them away because surely all of these other professionals have better opinions. As I began to play I could feel the weight of trying to please everyone in the history of the world being lifted off my shoulders. I took all of my studying and knowledge I had gained, boiled it in my brain, and then made my own decisions. I also began to enjoy playing it more.

Step 5: Write down adjectives and descriptive phrases to help you focus your playing

These were two very big lessons to learn. I still, however, had to figure out how I wanted to play Beethoven. Around this time I started to journal my practice sessions and take lots of notes from lessons to apply to the practice room. What I found myself doing was writing down a lot of adjectives as my opinions grew stronger. I would write down words like:

“light”                                                  “aggressive”                                       “humorous”

“on the backside of the beat”           “with weight”                                    “tight”

“regal”                                                  “pointed”                                            “grand”

I cannot over emphasize enough how helpful this is. Take an audition list with 50 excerpts and multiply that by 10 adjectives per excerpt. That’s 500 descriptions for the audition!!! That’s a lot of helpful information! It is also a lot to remember, so journaling will help tremendously.

Here are my notes for Beethoven 7 for an audition, cough cough, about 10 years ago. The iPod reference dates me…

2015-04-27 09.09.54

All of these are one word and short phrase descriptions of how I wanted to sound. What I realized I was doing was breaking down something that was very complex (Beethoven) and boiling it down to lots of simple elements. There is no changing something that is complex that has the baggage of Beethoven but I can try to be as simplistic about how I describe it to myself. I can describe a passage as “having some weight, but soft, with a crisp articulation, with very square, un-stylized rhythms.” In this scenario I’ve painted a very specific picture of how I want the passage to sound by using lots of adjectives or descriptive phrases. They are also very clear descriptions that I understand, rather than “it should sound sad.”

I know a lot of students feel this way about various styles of music. It is very easy to be intimidated by certain styles or composer’s works. Trust me, I’ve been there! A healthy amount of respect is certainly due to these areas you feel intimidated by, but NO music should feel un-performable. This is music after all. Not brain surgery. There can always be room for improvement, but how will you improve if you don’t start somewhere? By using this very simple idea in your journaling, you can make the unapproachable, approachable.

WJ

Technique Improvement and Maintenance: My Warm Up Routines – Tambourine

In the last installment of this series I’m going to tackle the tambourine. I think I’ve got some pretty good tips for good tambourine playing but I’ve found that a lot of success can come from just experimenting with angles and different methods of playing. Try my tips to see if they work but I’d really encourage you to experiment and find your own solutions.

Holding the tambourine
The typical thought process as to which hand to hold the tambourine with is to use your non-dominate hand. This will allow your dominate hand to play rhythms on the shell or head of the tambourine. The grip should be as similar to a drum stick grip as you can (considering you are holding a round object…) Similar to a drum stick grip, you want as much of your hand in a neutral position as possible. The least amount of tension the better.

2015-04-19 17.51.48

Most playing will be done with the tambourine at a 45 degree angle. This allows some jingle ring but also give a reasonable amount of clarity. For lots of clarity, hold the tambourine parallel to the floor. For lots of jingle ring (like in a roll), hold it at a 90 degree angle to the floor. Experimenting with different angles in different musical contexts can be fun and give you better musical results.

The head
It is very quickly forgotten that the tambourine has a head attached to it. There is your Captain Obvious statement of the day. Just like a snare drum we may want to change the resonance of that head – make it drier or let it ring. This is all well and good but we want to remember that whatever we choose, we most likely want that to remain consistent throughout. You wouldn’t add some more muffle during a soft passage of a Delecluse étude and then take it off for a loud roll. The tambour would chance so much that it would confuse the listener. The same is true of tambourine. This problem generally occurs when transitioning from soft to loud playing or vice versa. This can be overcome by paying VERY close attention to your palm, arm, and fingers to make sure they are (or are not) touching the head when you want them to. I have found moongels work great to solve this problem. Just like a snare drum muffle, they keep the head sounding consistent. And I’ve virtually never had a problem of one flying off!

Playing rhythms
Similar to my triangle playing, I try to play as much of the rhythms I can using one hand. If I want a very clear rhythm I will stay very close to the edge, if not right on the edge. If I want more head “pop”, I will move closer to the center of the head. For super soft dynamics I use one finger and the louder the dynamics get I will add more. I will also add more wrist and eventually arm as the dynamic range gets larger. I generally don’t use my entire fist unless I am really trying to cut through the ensemble at a loud dynamic level. Playing with the fist has a great pop to it which can cut, but I save that for only the loudest of situations.

Playing rhythms with one hand is obviously not always possible and faster rhythms needed to be played with either 2 hands or a combination of hand and leg. Here are several solutions when using two hands.

2015-04-19 17.52.382015-04-19 17.53.152015-04-19 17.54.00

When needing to using your hand and leg (note I say leg) here are some more options.

2015-04-19 17.54.382015-04-19 17.54.57

The reason I don’t always use my knee is because the knee tends to give the tambourine sound a big pop, which isn’t always wanted. We want our rhythms to sound consistent, so we want the “hand” sound to match the “leg” sound.

Tambourine rolls
The two tambourine rolls we use are a shake roll and a thumb roll. I actually don’t use the thumb for a “thumb roll” but the concept is still the same. I use my middle finger at about a 45 degree angle to the tambourine head and slide it across the head to make the tambourine and jingles vibrate. I use the middle finger because this is typical what I use to play rhythms with, making the transition between rolls and rhythms much easier. To make the roll easier I apply bass rosin to the head. A lot of people use beeswax for this which is fine. I use rosin because I just happen to prefer it and it’s an easy commodity to find at an orchestra rehearsal if you lose yours!

2015-04-19 17.55.25

The shake roll is one of the most difficult parts of playing the tambourine in my experience. For some this comes easy but I have had to really work at it. There are two techniques used to accomplish the shake roll. The goal of both is to have the most sustained sound possible. The first is to rotate the arm similar to if you were twisting a door knob very quickly. The other is to hold the tambourine above the elbow and rotate the elbow back and forth. The key to both techniques is to try and get the tambourine to move in three dimensions rather than just two. Shake rolls that sound rhythmic tend to be very side to side and only in 2 dimensions. This helps keep the jingles in constant motion, leading to a more sustained sound.

2015-04-19 17.56.292015-04-19 17.56.46

An exercise I use to work on this is to put a tambourine in both hands and go back and forth playing a roll. Generally one hand does one aspect better than the other, and each hand can teach the other. This also allows one hand to recover as the other is rolling. This is a very physical technique after all. I find this very simple exercise very useful when trying to iron out my roll.

Well that’s it for this series. I hope it was helpful in finding ways to improve your playing. I’ve got a few more ideas up my sleeve for the weeks ahead, but let me know if there is something specific you would like to see here. Been loving the comments!

WJ

Thanks again to my lovely wife for taking these photos.

Technique Improvement and Maintenance: My Warm Up Routines – Triangle

Believe it or not, on occasion, I practice the triangle. Maybe I don’t need a 20 minute warm up routine for triangle, but there are definitely certain skills I want to stay sharp on. For this reason I am going to focus on a little bit more of the “how to” part of playing triangle in this post. I’ll also cover how I practice it as well. Triangle may be the joke instrument of the percussion section but the older I get, the happier I am to be playing triangle as it is one of the most portable instruments we play!

Holding the triangle
Holding the triangle should look graceful. We want to at least look professional. Resting the clip on the thumb and middle finger, leaves the other fingers available for muting if necessary. Holding the triangle around eye level is preferred so the audience can see what you are doing but also to allow the sound to travel without any interference from a music stand or any other instrument.

2015-04-12 16.57.06

Gripping the beater
I have heard of two ways to hold the beater, although I’m sure there are many more. The first is similar to a snare drum or timpani grip. Very typical, with most of the pressure using the thumb and first two fingers. The other is almost like the inner mallet using Stevens grip; the mallet just slides into a different place in the palm. Chris Deviney showed me this grip. It is a nice alternative option to use when playing rolls or rhythms in the corner of the triangle.

2015-04-12 16.57.342015-04-12 16.57.51

Playing areas
There are a lot of different sounds you can get out of the same triangle. The angle and placement make a big difference. A straight on attack will give you a more pure tone with less overtones.

2015-04-12 16.58.22

Adding more angle of attack will activate the triangle to vibrate in more of a three dimensional way and cause the triangle to have more overtones.

2015-04-12 16.58.40

I’ll cover how to play rhythms below but the same ideas can be used in the corners of the triangle when rolling or playing rhythms.

2015-04-12 16.59.422015-04-12 16.59.22

Now let’s get to actually playing the triangle and how to choose a triangle.

Almost all triangle playing for me breaks down into 3 categories.
1. Rhythms
2. Rolls
3. Single notes

Almost all triangles fall along two different spectrums
1. Clear tone —- overtone rich (shimmery)
2. Bright —- dark

Rhythms
Rhythms pose the most difficulties so let’s tackle them first. Generally when I am playing passages with anything remotely intricate I want a triangle with more of a pure tone that is clear so those rhythms will come out. If I use something with lots of overtones, the sound will be so broad and wide that the rhythms will just get lost. There is obviously a spectrum so you don’t have to immediately go to the clearest triangle you own, but this is a good philosophy to have. I generally let the musical context dictate whether I want a bright or a dark sound, but a bright sound will generally yield more clarity.

If lots of clarity of rhythm is needed a finger from the hand holding the triangle can mute part of the triangle. It doesn’t take much contact to really change the sound of the triangle so start conservative and add as needed.

2015-04-12 17.00.42

If I can play the rhythms needed with single strokes, I will, as my consistency will inevitably be better. If the rhythms are too fast, I have a couple options for how to solve this. The first option is to play in the bottom corner of the triangle with an up and down motion. The “up” motion is generally weaker so a lot of times I will start with an up motion to make the rhythms sound more even. Playing in this corner of the triangle also allows the player to transition to single strokes much easier as the beater is in more or less the same place.

2015-04-12 16.59.46

Another option for playing rhythms is in the top corner of the triangle. This can be great for rhythms that need to be very clear. The angle of attack helps that. However, it is difficult to transition to single notes from this position and keep a consistent sound.

2015-04-12 17.01.19

Sometimes I will completely choke the triangle for practice. This makes the rhythms extremely clear. Once I’m happy with the evenness of my rhythms, I will let the triangle ring normally.

2015-04-12 17.02.11

The last option is to mount the triangle and play with two hands. This can be great for very intricate rhythms that need to be clear. It also makes execution tremendously easier! The downside is there is very little control of the ring in this position as both hands are occupied. When choosing this method it is important to mount the triangle using a very secure stand (usually a cymbal stand). Music stands are fine in a pinch but you will notice the triangle will make the entire music stand vibrate and take away from the triangle’s sound.

2015-04-12 17.04.54

Rolling
Triangle rolls are trickier to get a nice blended sound than one would think. We don’t want a dinner bell triangle sound 99.9% of the time. Playing in the bottom corner, with an angle that is consistent, is the best method. The alternate grip mentioned above helps this. This area is also great when needing to transition into single notes.

There are some additional techniques you might want to think about in certain situations. If the roll has a strong beginning, I like to put a burst at the start of the roll, giving it a nice accent. This leaves no confusion as to where the start of the roll is. If the roll needs to sound quasi-rhythmic then I will lessen the angle of attack on the triangle so I am getting less overtones.

Single notes
Some of the best parts in all the repertoire are single triangles notes. Just like a great soft cymbal crash, these notes can really capture a great moment. I am very picky about my triangle sound in these moments. It is here where we can really think about our full spectrum of sounds mentioned above. If I can use a really shimmery sound to capture a single note I will. If I need to play some slower rhythms then maybe I need to go with something a little more clear.

Just like with mallet playing, soft doesn’t always mean to use a small beater. A soft note played with a large, heavy beater can give the note more presence without necessarily more volume.

Another technique I will use when I can is vibrato. If you play a single note and then move the hand holding the triangle back and forth you will get a vibrato sound. This is definitely not for all situations, but can be a nice touch. I’ve had a few brass players turn around, notice it and smile a few times.

Triangles are a lot like cymbals in that each one is different. There is a lot of room for experimentation and thought. I generally practice the roll and controlling my rhythms. For that I use Keith Aleo’s book Complementary Percussion. It’s such a great resource for these accessory instruments. The rest I treat as a big sound experiment to see what options fit the work the best.

The final installment of this series is coming up. Tambourine. As always let me know if you have any questions and thanks so much for all the support!

WJ

Thanks to my lovely wife for reluctantly taking all of the photos in today’s blog…

Practice Goals – Hour Time vs. Calendar Time


I find in both my own practice as well as my students, that it is very easy to have unrealistic goals. We all want to build Rome in a day. Wouldn’t that be nice. We might be able to build a few houses in a day, but certainly not the whole city. For this reason, I separate practice goals into two categories for my students. Hour time and Calendar time. Skills that can be learned in hour time are short term goals. Skills that require weeks and months to perfect take calendar time.

clock
Hour time is much easier to manage because we deal with it every day. Reviewing the snare drum part to Prokofiev’s Fifth Symphony won’t take very long. Memorizing the last 20 bars of a solo is something you can accomplish today. Learning a small part for a brass ensemble gig would also fall under hour time. These are all tasks that can be started and completed in a few hours, maybe even one hour. If you are having difficulty completing these tasks in a relatively short period of time then we need to examine your efficiency in the practice room.

Calendar-Generic
Calendar time is the time needed to learn and perfect big goals. It is unrealistic to learn Velocities in a week. This takes calendar time. It is naive to think you can perfect your timpani roll in a few days. Again, it’s going to take a while. Calendar time is unique because it not only takes a lot of hours to learn those concepts, but it also takes space between those hours. This is why I call it calendar time.

I’m sure if I locked you in a room with food and water and said you have a week to learn the notes to Velocities, you might be able to get close. But the experience would be terrible and odds are your memorization would be shaky at best. Now take that same 80 or so hours you spent in one week and spread it over 6 weeks and I bet you will yield a much better result. This is because of two reasons. You were more efficient in those hours and there was more time in between for your mind to literally digest the notes. This is precisely why I look at these larger tasks being accomplished over calendar time rather than hour time.

It is easy to understand big picture vs. small picture but isn’t there some space in between? This is the challenge. Big picture goals, like learning a snare drum roll, takes lots of individual practice sessions in which progress is slowly compounded into a tangible result. To do this, we must break the giant task into small steps. If you are learning a solo, concentrate on small sections. If you are learning a skill, like the snare drum roll, concentrate on isolated elements. The kicker is, not to look at the forest when you are working on the trees. If I’m focusing on keeping my wrist stabilized and not bending during my roll, of course my roll is going to sound terrible. I’m concentrating on a very isolated part of the roll. I don’t have all of the elements put together yet. Once I have all the isolate elements perfected, then I can start to put them together and begin to look at the forest.

The best sports analogy I use for this is my golf swing. I get so frustrated on the golf course because I don’t have a Rory McIlroy swing. I know what I’m supposed to do, but it’s so hard to repeat. It’s totally unrealistic for me to think I’m going to perfect the golf swing in a week or so. Maybe even in a few months. I can isolate small parts of it though and concentrate on one at a time. That is way more realistic. I gotta say though, this music thing is really getting in the way of fixing my golf swing…

A large part of this concept is for our brains. We can only practice one thing at a time and we can only do so much in a day. But when we look into the future or look into the past it is easy to get frustrated when skills are not learned in the time frame we would like. Patience and understanding that certain things take calendar time are important to maintaining our sanity. In my own practice I have found much more success when I slow down and really take my time, trusting that the end result will come.

WJ

I know I’m late finishing up my Technique and Warm-up Series. Thanks for being patient. The travel and vacation has thrown me off but the last two installments will be up in the next two weeks.

Technique Improvement and Maintenance: My Warm Up Routines – Cymbals

Cymbals

Cymbals are one of my favorite instruments to play in the orchestra. They can define a huge climax or color a soft, delicate passage. The color palette is extremely wide and the opportunities for experimentation are just as many. We sit in the back of the orchestra for so long, waiting for a chance to play, that it is nice to be creative when given the chance. I also think that cymbals can be one of the most intimidating instruments to play; especially for younger students. Just like your soft snare drum roll, if you don’t spend dedicated time to practicing it, chances are it isn’t going to be very good. Scheduling regular practice time on cymbals in vital to having a good, consistent crash.

So how should we practice cymbals? Learning a good basic crash should be the first item on the to do list. This should cover the mf and above dynamic. The first thing we are all taught is that the cymbals need to come together with a flam. You can have the top hit first or the bottom hit first. Either way will work. This will prevent the air in-between the cymbals from ever being totally trapped and compressed, which causes an “air pocket”. All percussionists are more familiar with the air pocket than they would care to admit…

2015-03-14 14.13.242015-03-14 14.13.16

I also practice the cymbals coming together in super slow motion to find the best angle in which they like to come together. I’m not worried about the sound so much right now as I am finding a comfortable flam between the two cymbals.

Once we find a nice comfortable angle at which the cymbals can come together, the cymbals have to come apart. This is an often forgotten part of the crash and can lead to the dreaded air pocket. When choosing which end of the cymbal should hit first in my flam I prefer the bottom hitting first because the natural weight of the cymbals and gravity cause the cymbals to come back apart. The video below shows how gravity can help the cymbals come apart. When the top hits first (my personally feeling is) the hands and arms have to do more work to get the cymbals apart.

Now that we have a basic crash, we need to be able to repeat it. Consistency is a huge part of cymbal playing. You should be able to play 10 crashes in a row and they all sound the same. Not an easy task! So this is how I start my practice routine. I play a series of crashes at no particular tempo with the goal of them all sounding the same. My focus is on sound and my hands executing the same motion every time for a consistent crash.

2015-03-14 12.16.49

Keith Aleo‘s book Complementary Percussion, is a fantastic resource for exercises and etudes to work on all complementary instruments. Once I have consistent crashes I work through his exercises on page 33 & 34 to start controlling the cymbals with a specific tempo on the metronome. I do all of this at a mf or louder dynamic.

Just like with snare drum, I spend specific time practicing soft. The soft crash is slightly different than a mf crash or louder because all of the movements are minimized. The crash still needs a flam but the angle is smaller, the softer you get. I also slowly shift where the cymbals are in my preparation so that the cymbals are more vertical the softer I get. I find that at the soft dynamic, my eyes need to be more involved in checking the angle of attack. At the louder dynamic I can do this by feel, but at the softer dynamic, I need my eyes to do it. The pictures below show the progression of how I prepare from mf to ppp.

2015-03-14 14.13.432015-03-14 14.13.502015-03-14 14.13.562015-03-14 14.14.01

To get used to this concept I will play Keith’s exercise A but with a long crescendo and then a long diminuendo.

So we can play a crash, but now we need to stop it… Muffling the cymbals is just as important as the crash itself. A lot of times the composer doesn’t give us a lot of information on how long the note should be. So we have to make that decision ourselves. We also have to determine if the end of the note is quick or if we want to slowly damp the cymbals so the end of the note is less apparent. All of these options should be practiced so they are comfortable when in a performance situation. From a purely technical standpoint, I muffle the cymbals with my stomach. This keeps these large metal objects away from my ribs so I won’t have to worry about injury.

To round out the rest of my crash cymbal practice session, I will work on one of Keith’s etudes a day. Once I get to 10, I’ll go back to 1.

There are some extended techniques that can work great in specific circumstances. Occasionally I will leave the cymbals together a little bit longer than necessary on a soft crash and let them sizzle. This happens right as they come apart. I will leave the top edges still touching and lets the cymbals vibrate against one another for a nice effect. I will also occasionally scrape one cymbals against the other for a long note. This can also be done on suspended cymbal but the effect of two cymbals is different and can be very nice in the right situation.

Crash cymbals are only one part of the demands on the cymbal player. Suspended cymbal playing is a huge part of the symphonic repertoire. Granted it isn’t the most technically demanding aspect of percussion playing but it might be one of the most creative! Just like mallet, bass drum, or timpani playing; I have a lot of sticks that create different sounds on the cymbals. Think of these sticks like different articulation options for the cymbals. You can scrape the cymbals with a file to create a long sound. You can strike it with a stick for a quick sound. You can tap it with a triangle beater for a ping sound. You can softly strike it with a soft mallet for a warm sound. Experiment with different options so your spectrum of available colors if wider. The picture below is of all my suspended cymbal sticks. I also use a variety of triangle beaters for scrapes and such but they wouldn’t fit on the table!

2015-03-14 19.43.20

There are some great resources out there for continuing to work on your cymbals playing. Zildjian has a great online Education Guidebook that is perfect for beginning players and teachers. They also have some great resources for how to pick out your first pair of cymbals. The Art of Bass Drum and Cymbals Playing by Tony Cirone and Garwood Whaley is another great resource.

Thanks for reading and stay tuned for the next post about more accessories featuring triangle and tambourine. As always leave comments below if you have something unique that you like to practice on cymbals.

WJ